¶ ROS2 Foxy on Raspberry PI OS arm64
¶ Description and Justification
ROS2 only supports a binary installation on Ubuntu for the Raspberry PI. There are no ROS2 packages nor images available for the official Raspberrypi OS (arm64) image from the Raspberry PI foundation. Using the official Raspberry PI OS image is preferable since everything of the official Raspberry PI is or will be supported. Also, many guides and help from the Raspberry PI community can be used. Ubuntu is still not so used for Raspberry PI.
At the beginning of this work, there were three possible alternatives to get ROS2 (Foxy) within the official Raspberry PI OS (arm64) image:
- Trying to use the official repositories for Ubuntu Focal for RaspberryPI arm64. Possible expected problems were: debian package dependencies not met, dependencies maybe met now but not in future updates, dependencies met but runtime errors because of incompatibilities with particular library differences between distributions.
- Using crosscompile utilities to crosscompile ROS2
- Compiling ROS2 from source inside the Raspberry PI OS arm64 image.
Option 1 was not even tried because of the expected problems mentioned above. It is a dirty solution from the very beginning.
Option 2 was explored [1] [2] [3] [4] [5] [6]. In the first reference, the tool seemed to be oriented for any linux distribution but it is not updated, it uses ament instead of colcon, it doesn't seem to work with ROS2 foxy. The official ros2 crosscompile tool seems to be very oriented to Ubuntu and it gave problems with the official Raspberrypi image.
Option 3 was successful and it is explained here
¶ Resources
The image used is from [8]. For arm64 the Rasperry PI foundation decided to switch from Raspbian OS to Debian Buster for assemblying its official image. The initial image used in this tutorial can be downloaded from here and here.
¶ General methodology
- Download official Raspberry PI OS arm64 image
- Compile ROS2 on it according to official ROS2 compiling from source tutorial. Because the Raspberry PI is too slow and has not enough memory compilation is expected to fail. Therefore it is necessary to run compilation with a qemu emulated machine with higher capability than normal.
- Run compilation on qemu using official RPI OS image.
qemu has official support for raspberry pi 1,2 and 3 (not 4 yet). But the problem is that it only supports a maximum memory of 1GB and a maximum of 4 cores (processors). It also has other limitations (network support).
It is necessary to run the official RPI OS image with qemu in a more capable, but still compatible arm64 qemu machine. This is possible with the -M virt machine. But this has other complications that will be explained below.
¶ Instructions
-
Download Raspberry PI OS arm64 official image
-
Uncompress the image
mkdir -p ~/rpi/rpiosarm64
cd ~/rpi/rpiosarm64
wget  http://downloads.raspberrypi.org/raspios_arm64/images/raspios_arm64-2020-08-24/2020-08-20-raspios-buster-arm64.zip
unzip http://downloads.raspberrypi.org/raspios_arm64/images/raspios_arm64-2020-08-24/2020-08-20-raspios-buster-arm64.zip
Before running the image with qemu -M virt arm machine it is necessary to deactivate mounting /boot from within the image.
-
Mount the filesystem and edit /etc/fstab:
sudo losetup -f --show -P 2020-08-20-raspios-buster-arm64.img sudo mount /dev/loop10p2 /mnt/2 sudo nano /mnt/2/etc/fstab -
Comment out the line with the /boot mount directive
-
Unmount and free the image:
sudo umount /mnt/2
sudo losetup -d /dev/loop10
To run a qemu -M virt machine one need a kernel file and an initrd file. The RaspberryPI OS arm64 official image doesn't come with an initrd file, and it doesn't boot without it. The solution is to download a debian buster raspberrypi 3 for arm64 image, extract the kernel and initrd files and use these two files together with the RPI OS official image to run to able to run qemu -M virt
-
Download the debian buster raspberry pi 3 arm64 image from here or here. Uncompress the image.
mkdir -p ~/rpi/debian cd ~/rpi/debian wget https://raspi.debian.net/verified/20210210_raspi_3_buster.img.xz xz -d 20210210_raspi_3_buster.img.xz -
Resize this image to 14GB. ROS2 compilation needs a lot of space. Check to not exceed your SD card size
qemu-img resize 20210210_raspi_3_buster.img 14G -
Mount the image and extract the kernel and initrd files:
sudo losetup -f --show -P 20210210_raspi_3_buster.img
sudo mount /dev/loop10p1 /mnt/1
cp /mnt/1/kernel* .
cp /mnt/1/vmli* .
cp /mnt/1/init* .
sudo umount /mnt/1
sudo losetup -d /dev/loop10
Now it is possible to run the qemu -M virt machine
With the virt machine it is possible to run many core with a lot of memory. We used 8 cores and 16GB of RAM.
-
Run the image with qemu -M virt:
cd ~/rpi/rpiosarm64 qemu-system-aarch64 -M virt -m 16G -smp 8 -cpu cortex-a53 -kernel ../debian/vmlinuz-4.19.0-14-arm64 -initrd ../debian/initrd.img-4.19.0-14-arm64 -drive if=none,file=2020-08-20-raspios-buster-arm64.img,format=raw,id=hd -append 'root=/dev/vda2 noresume' -net nic -net user,hostfwd=tcp::2222-:22 -device virtio-blk-pci,drive=hd -device virtio-rng-pci -no-reboot -nographic -
Inside of the qemu machine, use raspi-config to extend the filesystem size to the complete image size. You will need this to compile ROS2
-
Follow the ROS2 foxy compilation instructions from here [10]
-
Close the qemu running machine
Before using the image with the real raspberry pi, it is necessary to activate the mounting of /boot partition within the image
-
Mount the filesystem and edit /etc/fstab:
sudo losetup -f --show -P 2020-08-20-raspios-buster-arm64.img sudo mount /dev/loop10p2 /mnt/2 sudo nano /mnt/2/etc/fstab -
Uncomment the line with the /boot mount directive
-
Unmount and free the image:
sudo umount /mnt/2 sudo losetup -d /dev/loop10 -
Copy the image to your microSD card:
sudo dd if=2020-08-20-raspios-buster-arm64.img of=/dev/mmcblk0 bs=1M status=progress -
Run the raspberry pi with this sd card and configure the wifi and the rest of particular necessities.
-
All done!
¶ Running the finished image with the normal qemu -M raspi3b emulation machine:
-
Extract the kernel and dtb files from the image:
cd ~/rpi/rpiosarm64
sudo losetup -f --show -P 2020-08-20-raspios-buster-arm64.img
sudo mount /dev/loop10p1 /mnt/1
cp /mnt/1/kernel* .
cp /mnt/1/*.dtb .
sudo umount /mnt/1
sudo losetup -d /dev/loop10
Before being able to run this image it has to be extended to a power of 2 size: 16GB
qemu-img resize 2020-08-20-raspios-buster-arm64.img 16GB
NOTE: If you do this, this image may not fit in a 16GiB card (they are usually slightly smaller than 16GB)
You can use the following instruction to run a qemu machine with the finished image [11]:
qemu-system-aarch64 -M raspi3 -append "rw earlyprintk loglevel=8 console=ttyAMA0,115200 dwc_otg.lpm_enable=0 root=/dev/mmcblk0p2 rootdelay=1" -dtb bcm2710-rpi-3-b-plus.dtb -sd 2020-08-20-raspios-buster-arm64.img -kernel kernel8.img -m 1G -smp 4 -usb -device usb-mouse -device usb-kbd -nographic
To run with network support [9]:
qemu-system-aarch64 -M raspi3 -append "rw earlyprintk loglevel=8 console=ttyAMA0,115200 dwc_otg.lpm_enable=0 root=/dev/mmcblk0p2 rootdelay=1" -dtb bcm2710-rpi-3-b-plus.dtb -sd 2020-08-20-raspios-buster-arm64.img -kernel kernel8.img -m 1G -smp 4 -usb -device usb-kbd -device usb-net,netdev=net0 -netdev user,id=net0,hostfwd=tcp::2222-:22 -nographic
¶ Finished image Download
An already prepared Raspberry PI OS arm64 plus ROS2 foxy image can be downloaded here
¶ Flashing image onto SD card
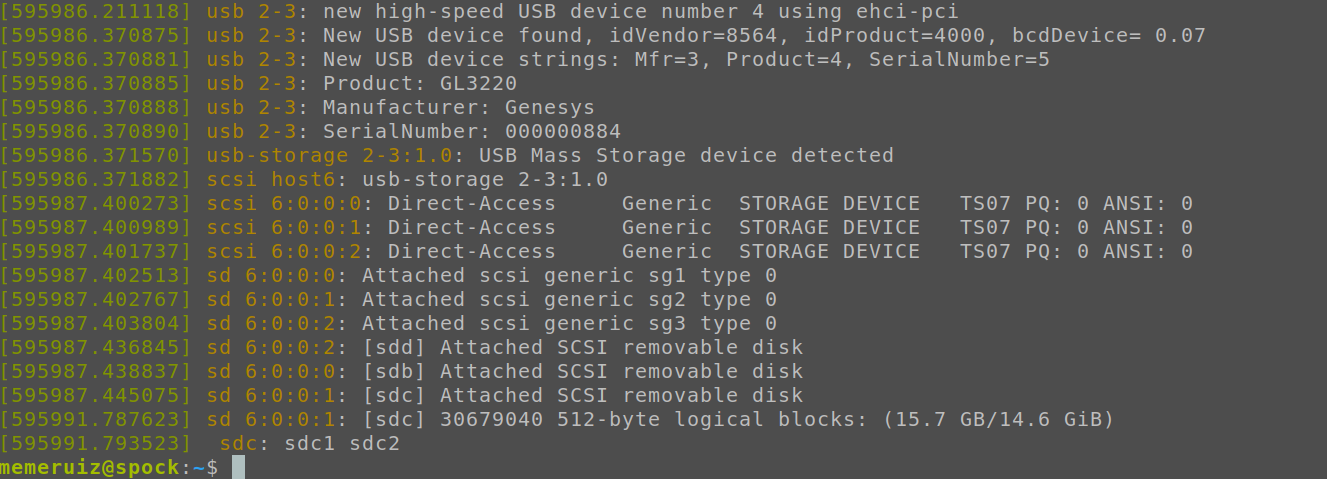
- Insert SD card on your laptop (you will need a 64GB SD card, I'm sorry ...). Normally the SD card on a laptop is associated with the file: /dev/mmcblk0 . After inserting an SD card in a laptop, the "sudo dmesg" command shows the following:

- If you are using an external USB SD adapter, the device file is something like /dev/sdb or /dev/sdc . After inserting SD card and connecting the USB adapter, use command "sudo dmesg" to find out the exact device filename. An example in a computer with only one harddrive but a multiple USB-CARD adapter looks like this:
-
Don´t mount the SD card. If gnome or any other Desktop environment automatically mounted the SD card, you must unmount the card before continuing. Check the documentation of your Desktop environment for unmounting cards
-
To copy the image to the SD card do the following (important: change /dev/mmcblk0 for your device file):
cd ~/Downloads
unxz -T 0 2020-08-20-raspios-buster-arm64_ros2.img.xz
sudo dd if=2020-08-20-raspios-buster-arm64_ros2.img of=/dev/mmcblk0 bs=10M status=progress
sudo sync
¶ Using the Rpi ROS2 image for the first time: (configure your own ROS2 workspace)
- Boot the Raspberry PI (3 or 4) with this image
- Login is as user: pi, password: raspberry
- Load the integrated ROS2 environment:
source ~/ros2_ws/install/setup.bash
- Create the new workspace (and clone the ROS2 tutorials):
cd ~
mkdir -p ~/ros2_my_ws/src
cd ~/ros2_my_ws/src
git clone https://github.com/ros/ros_tutorials.git -b foxy-devel
cd ~/ros2_my_ws/
colcon build
¶ Using the RPi ROS2 image regularly:
Now you should always use your our workspace. Always load both ROS2 workspaces before working in ROS2:
source ~/ros2_ws/install/setup.bash
source ~/ros2_my_ws/install/setup.bash
Now you can use ROS2. You must do this in each new console that you open.
¶ Smaller image (not tested well: ignore)
Here is another image but smaller so it fits in some small "16GB" sd cards (that are really like 13GB). This image doesn't have the "build" directory on the ros2_ws directory. If one runs colcon build in the workspace, it will try to rebuild everything with the RPi, which is insanely slow. Don't do it! It is better to create a new ws for your work and load the previous ws (ros2_ws) on top of the new one.
source ~/ros2_ws/install/setup.bash
source ~/wsr2/install/setup.bash
The new colcon build on "wsr2" shouldn't force a rebuild on the first one.
¶ Previous Related Work
https://wiki.arcoslab.org/doku.php?id=tutorials:ubuntu_18.04.3_server_ros_dashing_rpi3b&s[]=ubuntu
https://wiki.arcoslab.org/doku.php?id=tutorials:debian_buster_for_rpi3_with_qemu
https://cloud.arcoslab.org/apps/files/?dir=/General/Software-images&fileid=867
¶ References
[1] https://github.com/esteve/ros2_raspbian_tools
[2] https://index.ros.org/doc/ros2/Tutorials/Cross-compilation/
[3] https://github.com/ros-tooling/cross_compile
[4] https://answers.ros.org/question/303988/ros2-on-raspberry-pi/
[5] https://github.com/ahnan4arch/cross-compile-ros2
[6] http://design.ros2.org/articles/cc_build_tools.html
[7] https://old.reddit.com/r/raspberry_pi/comments/gs6omd/raspberry_pi_os_for_arm64_finally_released/
[8] http://downloads.raspberrypi.org/raspios_arm64/images/
[9] https://stackoverflow.com/questions/61562014/qemu-kernel-for-raspberry-pi-3-with-networking-and-virtio-support
[10] https://index.ros.org/doc/ros2/Installation/Foxy/Linux-Development-Setup/
[11] https://github.com/dhruvvyas90/qemu-rpi-kernel/tree/master/native-emuation
[12] https://roboticsbackend.com/install-ros2-on-raspberry-pi/