¶ Robot Body Coupler - Reacher/Extender Executor2
The Reacher/Extender Executor2 is a python client class for managing reachers and extenders from your own ROS2 program (RBC client).
¶ How it works:
¶ The old way:
Typically (formerly) to use the Robot Body Coupler from your own program, one has to:
-
Use the rbc_l2_ctrl RBC service to create the reachers and extenders.
Then the RBC creates the reachers and extenders as separate Python processes with their own ROS2 nodes for each reacher extender. With their own services, topics and actions. -
Connect to each reacher/extender node parameter service and configure it.
There is no special ROS2 python client interface for ROS parameters, therefore it is necessary to use the parameter services directly which is quite cumbersome. -
Connect to each reacher/extender dedicated service and action and manage its handshake for each carefully (an independent complicated state machine for each different reacher/extender)
This is the way the older RBC client examples are made: old_rbc_clients . One can check that the management of multiple ROS2 actions is quite complicated and doesn't scale easily nor cleanly.
¶ The new way (Reacher/Extender Executor2)
The Reacher/Extender Executor2 is a Python class that maintain a list of Reachers/extenders, together with the necessary additional data structures, to be able to maintain connectivity and communication between the client and the RBC server.
The list of Reachers/Extenders is created initially empty and it can be configured dinamically afterwards.
With the RE Executor2 one can:
- Add/create reachers/extenders (REs) (add_re)
- Set the parameters of a particular RE (set_params)
- Execute actions blocking or non-blocking on a particular RE (execute_action)
- Execute service calls of a particular RE (execute_action)
¶ The typical workflow is as follows:
- Create a reacher or extender:
add_re("local_client_node_name", "Reacher/extender name", "RE Type")
- Set RE parameters:
set_params("Reacher/extender name", parameters dictionary)
Now the reacher or extender is "ready" to execute commands!
- One can send an action command or a service command:
- To execute a service command:
execute_service("RE name", data/cmd)
Services are always blocking!
- Or to execute an action command:
execute_action("RE name", data/cmd dictionary, blocking=True/False)
After this, the user can change the particular RE parameters at any time to reconfigure the Reacher/Extender dinamically according to newer requirements using the set_params() function using the name of the particular RE.
¶ Example gitlab.com/arcoslab template repository
- Fork the repository: https://gitlab.com/arcoslab/arcos-lab-cognitive-architecture/robot-body-coupler/robot-body-coupler-client-template to your own new repository
- Clone your new repository to ~/wsr2/src
- From the current directory tree:
├── package.xml
├── resource
│   └── robot_body_coupler_client_template
├── robot_body_coupler_client_template
│   ├── __init__.py
│   └── robot_body_coupler_client_template.py
├── setup.cfg
├── setup.py
└── test
    ├── test_copyright.py
    ├── test_flake8.py
    └── test_pep257.py
- Rename the files "robot_body_coupler_client_template" to your own project name
- Edit the content of these files:
├── package.xml
├── <your_repository_name>
│   └── <your_repository_name>.py
├── setup.cfg
├── setup.py
- Inside all those files change all instances of "robot_body_coupler_client_template" to your own project name
- colcon build
- now you can run your own RBC client program with:
ros2 run <your_repository_name> <your_repository_script_name> --ros-args -r __ns:=/sim_humanoid_01
Change the namespace from sim_humanoid_01 to sim_asimilar_01 depending on your robot
- Finally adjust your <your_repository_name>.py program to your needs. Make new scripts in that same directory if needed and add them in file setup.cfg
¶ Understanding and running the template example
The template git repository is also a couple of RBC RE Executor2 examples.
To run it:
- Directly clone the template:
cd ~/wsr2/src/
git clone https://gitlab.com/arcoslab/arcos-lab-cognitive-architecture/robot-body-coupler/robot-body-coupler-client-template
- Run your robot simulator:
Humanoid:
ros2 launch arcos_lab_humanoid_startup arcos-lab-humanoid-startup-sim_humanoid_01.launch.py
Asimilar:
ros2 launch arcos-lab-asimilar-robot-startup arcos-lab-asimilar-robot-startup-sim.launch.py
- Colcon build:
cd ~/wsr2/
colcon build
- Run the example:
Humanoid:
ros2 run robot_body_coupler_client_template robot_body_coupler_client_template --ros-args -r __ns:=/sim_humanoid_01
Asimilar:
ros2 run robot_body_coupler_client_template robot_body_coupler_client_asimilar_template --ros-args -r __ns:=/sim_asimilar_01
The example has:
- One Joint Reacher
- One Vector Field Reacher
- One External Simulation Force Reacher
- One Touch Contact Extender
Remember to activate the TF plugin in rviz. The following Frames are relevant to the Reachers and Extenders:
- VF0_pose (VF reacher)
- ESF0_touch_sim (ESF extender)
- VF0_goal (VF reacher)
Also, add the wrench plugin in rviz to visualize the ESF extener Force Wrench.
Adjust the plugin with the following values:
- Force Arrow Scale: 0.05
- Torque Arrow Scale: 0.05
- Arrow Width 0.02
- topic: /sim_humanoid_01/ESF0/sim_touch_contact_view
(adjust sim_humanoid_01 to sim_asimilar_01 accordingly)
This plugin behaves strangly. You may have to tweak these values until you see the force.
To apply a virtual force run the following command:
ros2 topic pub /sim_humanoid_01/ESF0/sim_touch_contact_in rbc_msgs_srvs/msg/TouchContact "wrench:
  force:
    x: 10.0
    y: 0.0
    z: 0.0
  torque:
    x: 0.0
    y: 5.0
    z: 0.0
contact_point:
  x: 0.0
  y: 0.0
  z: 0.0"
(adjust sim_humanoid_01 to sim_asimilar_01 accordingly)
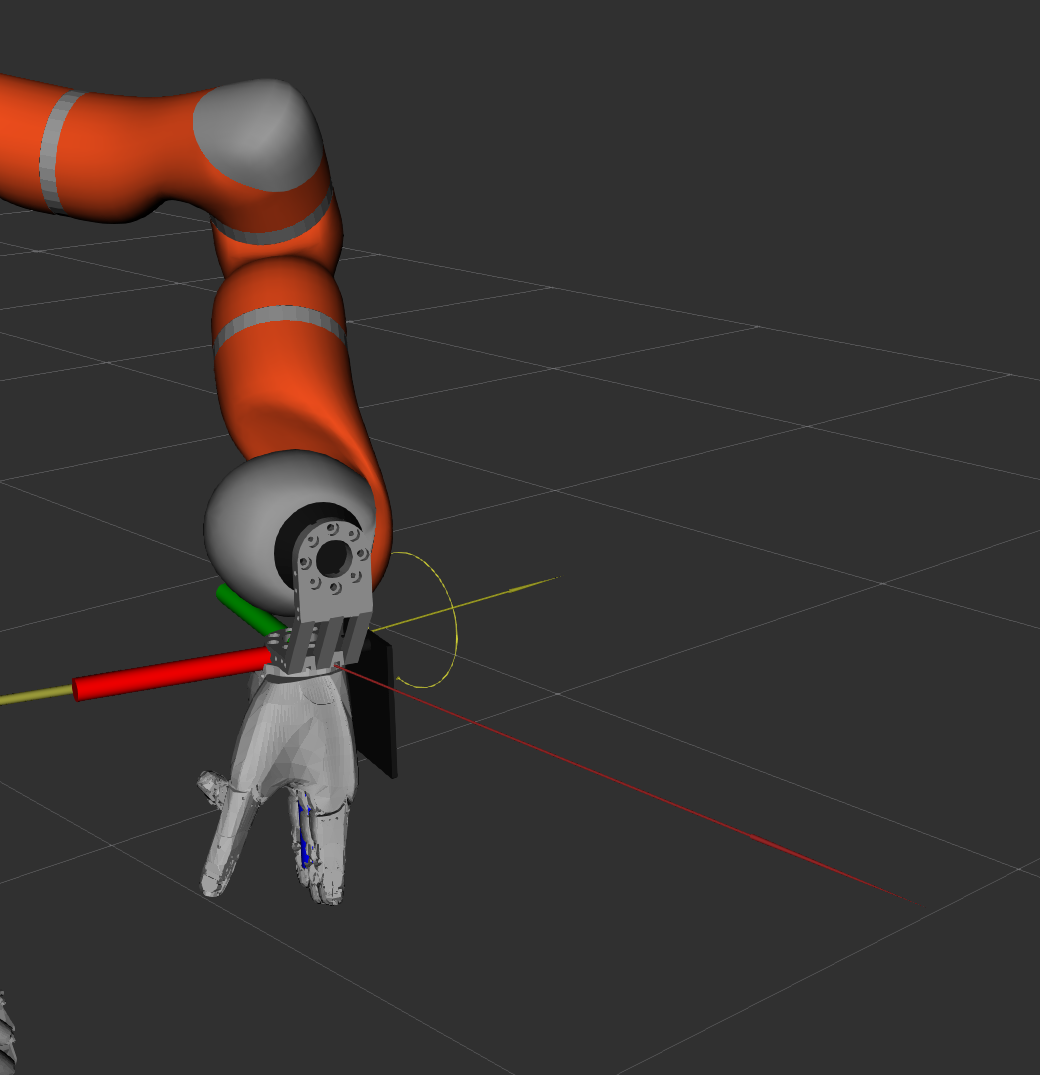
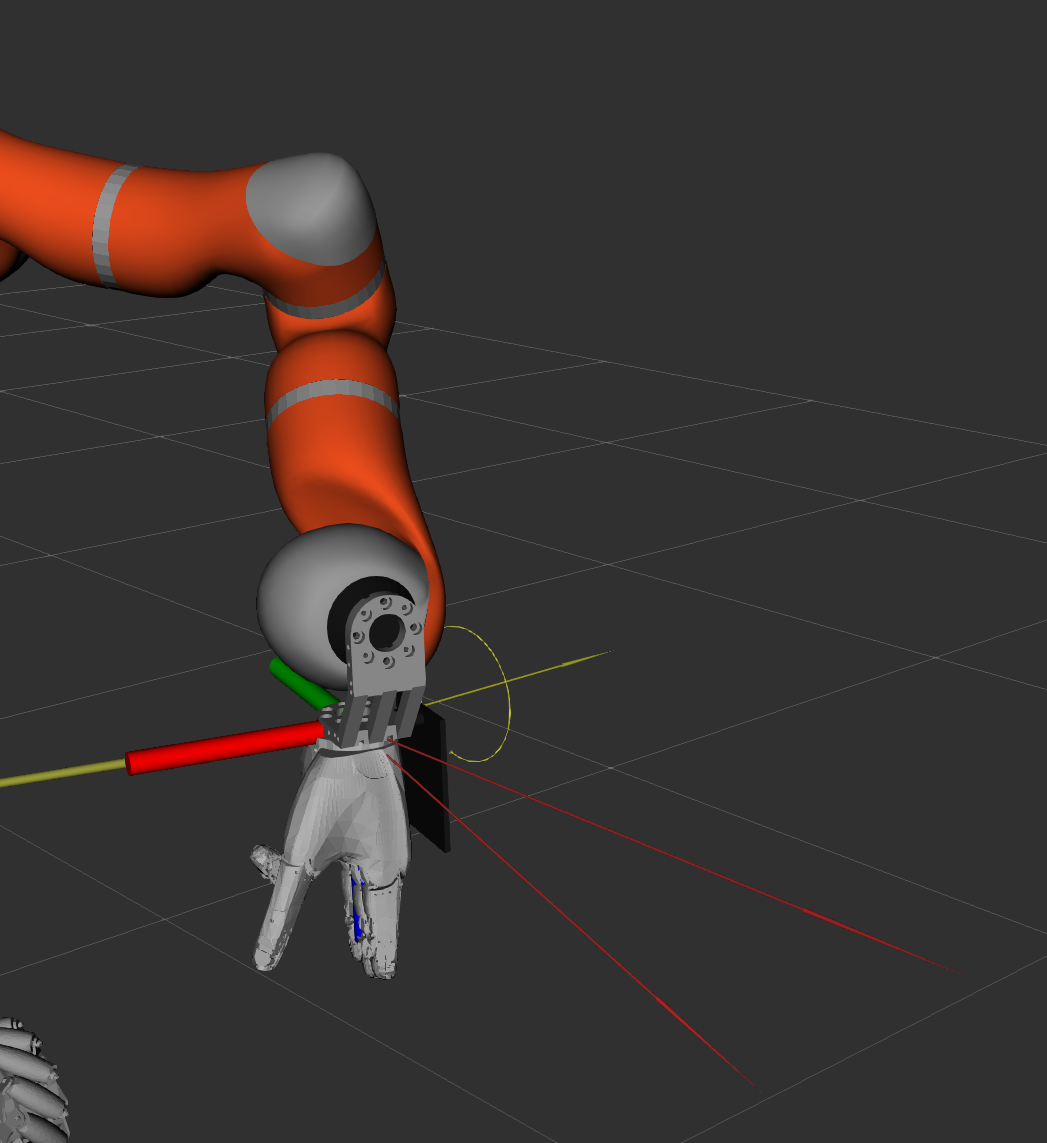
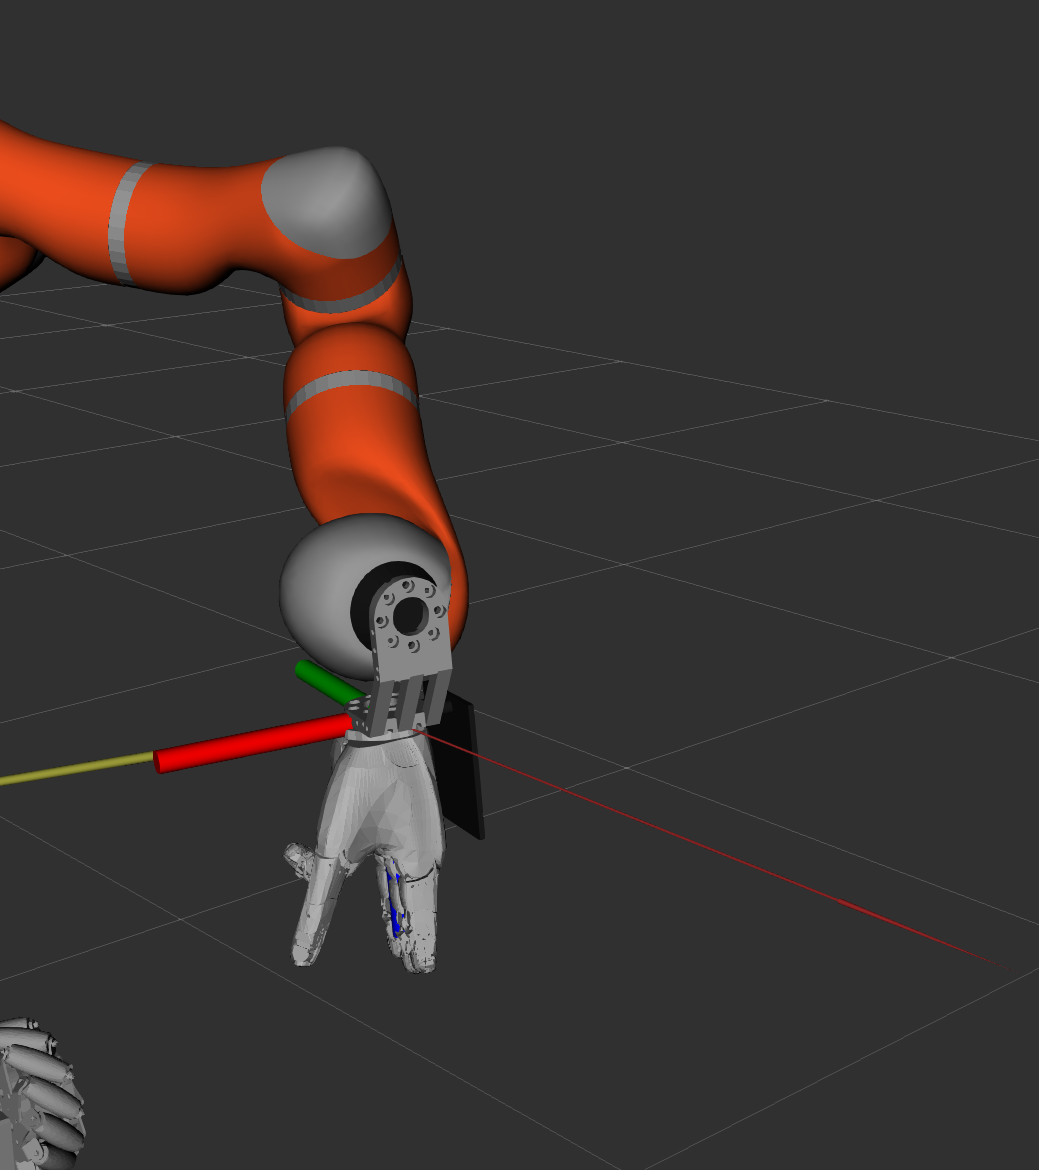
After this, the wrench plugin should show two arrows and a circle that represent the applied wrench like this:
Humanoid:
Asimilar:
The External Simulation Force Reacher keeps running even after the example program finishes
Finally, the last RBC module is the Touch Contact Extender.
The Touch Contact Extender must be run together with the External Simulation Force Reacher to simulate a force in our simulated virtual environment. In the real robot, the Touch Contact Extender runs without the ESF Reacher!
Remember to run a ESF Reacher together with the Touch Contact Extender!
Add another wrench plugin inside RViz
Configure it with the following values:
Adjust the plugin with the following values:
- Force Arrow Scale: 0.05
- Torque Arrow Scale: 0.05
- Arrow Width 0.02
- topic: /sim_humanoid_01/TCE0/touch_contact_view
(adjust sim_humanoid_01 to sim_asimilar_01 accordingly)
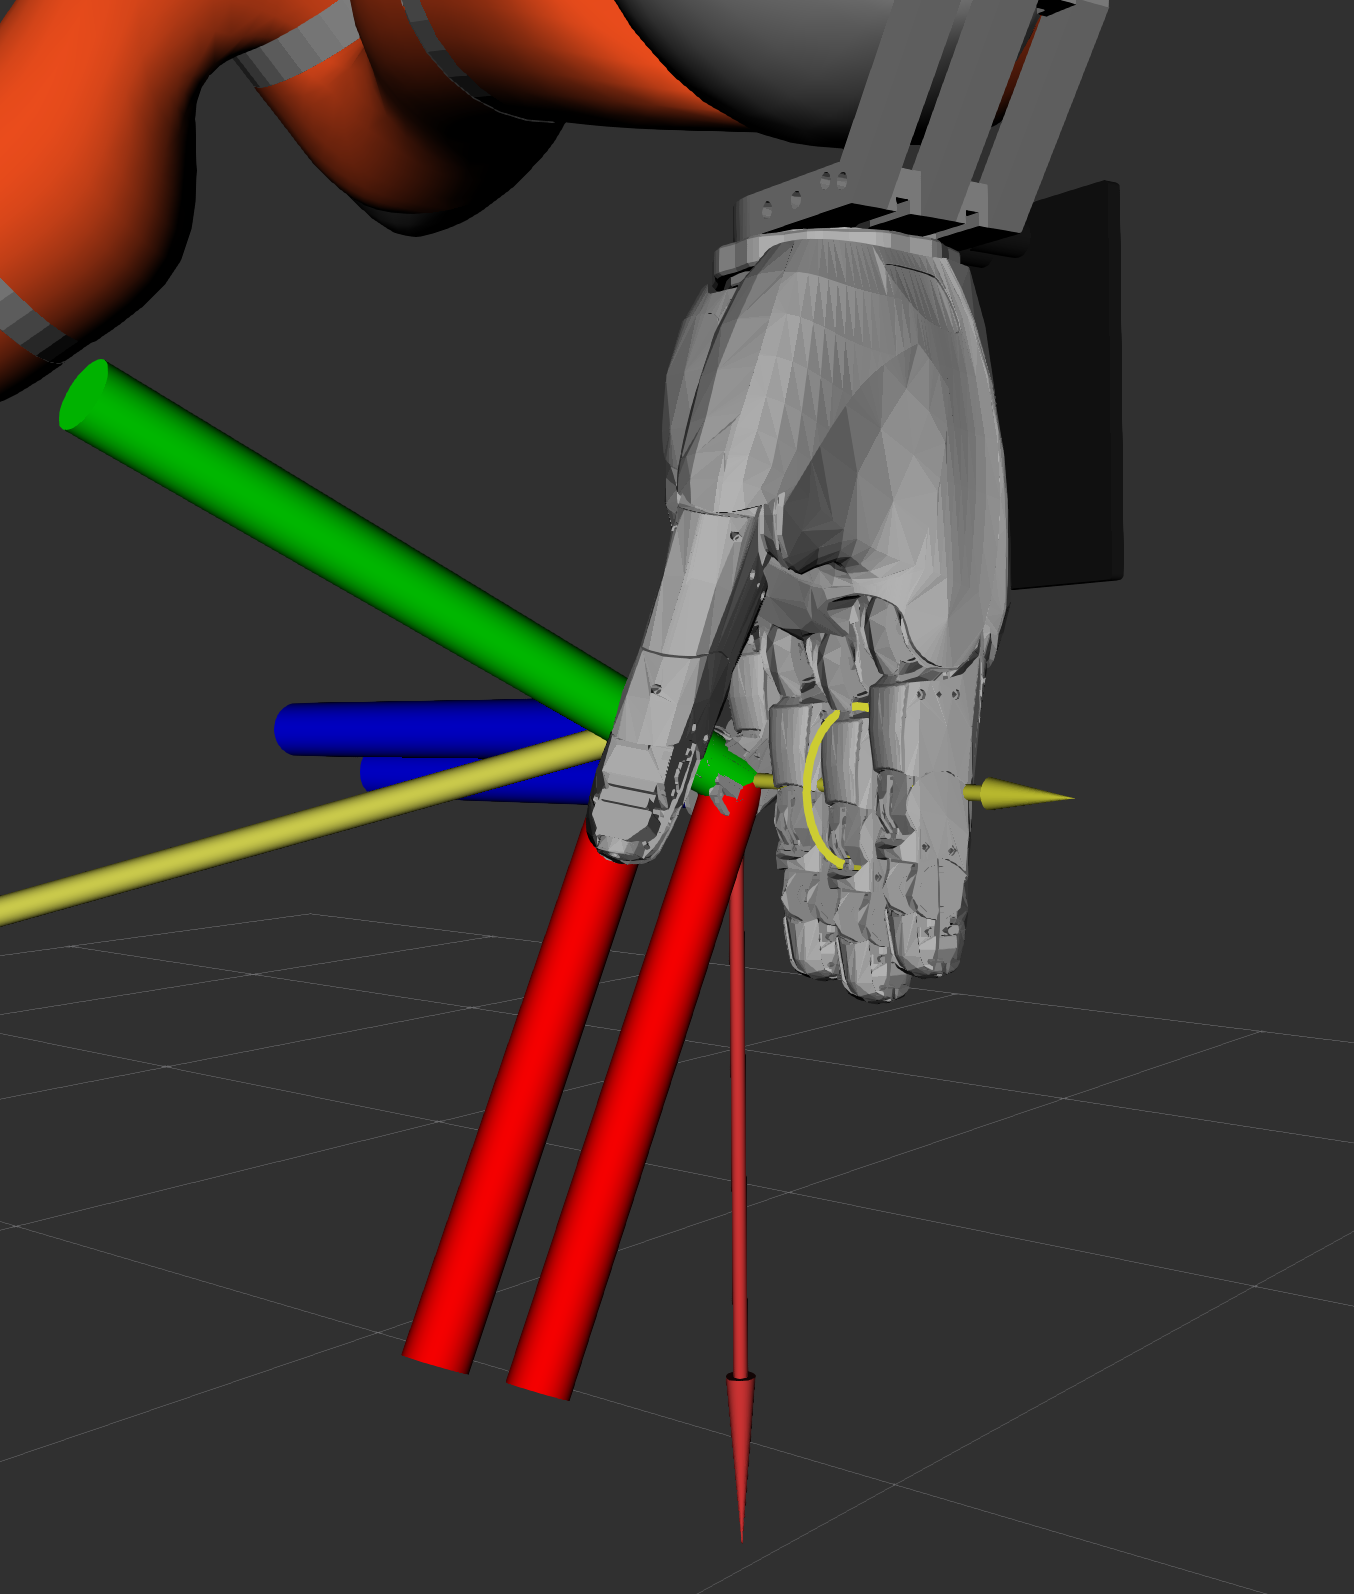
Results:
Humanoid:
Asimilar:
The visualized wrech should be similar to the one of the ESF Reacher. But there are details that must be carefully explained!!!!
TC extener is an estimation and can have limitations!!!! Carefull!!
The estimation differs from the applied force. The reason is because TC extender supposes that at the point of contact there are no torques applied and estimates according to this.
If we applied this force instead:
ros2 topic pub /sim_humanoid_01/ESF0/sim_touch_contact_in rbc_msgs_srvs/msg/TouchContact "wrench:
  force:
    x: 10.0
    y: 0.0
    z: 0.0
  torque:
    x: 0.0
    y: 0.0
    z: 0.0
contact_point:
  x: 0.0
  y: 0.0
  z: 0.0"
(adjust sim_humanoid_01 to sim_asimilar_01 accordingly)
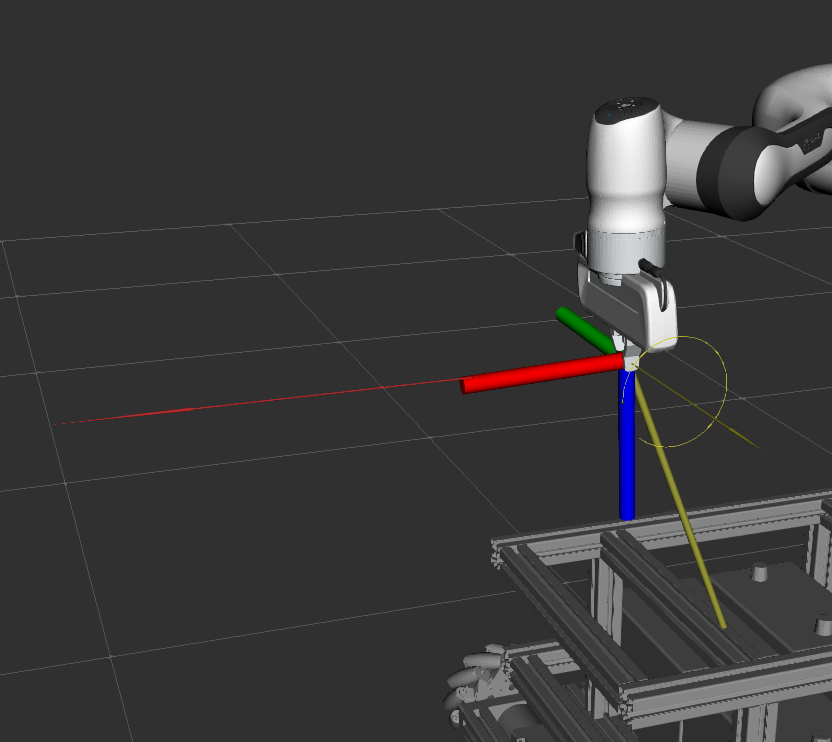
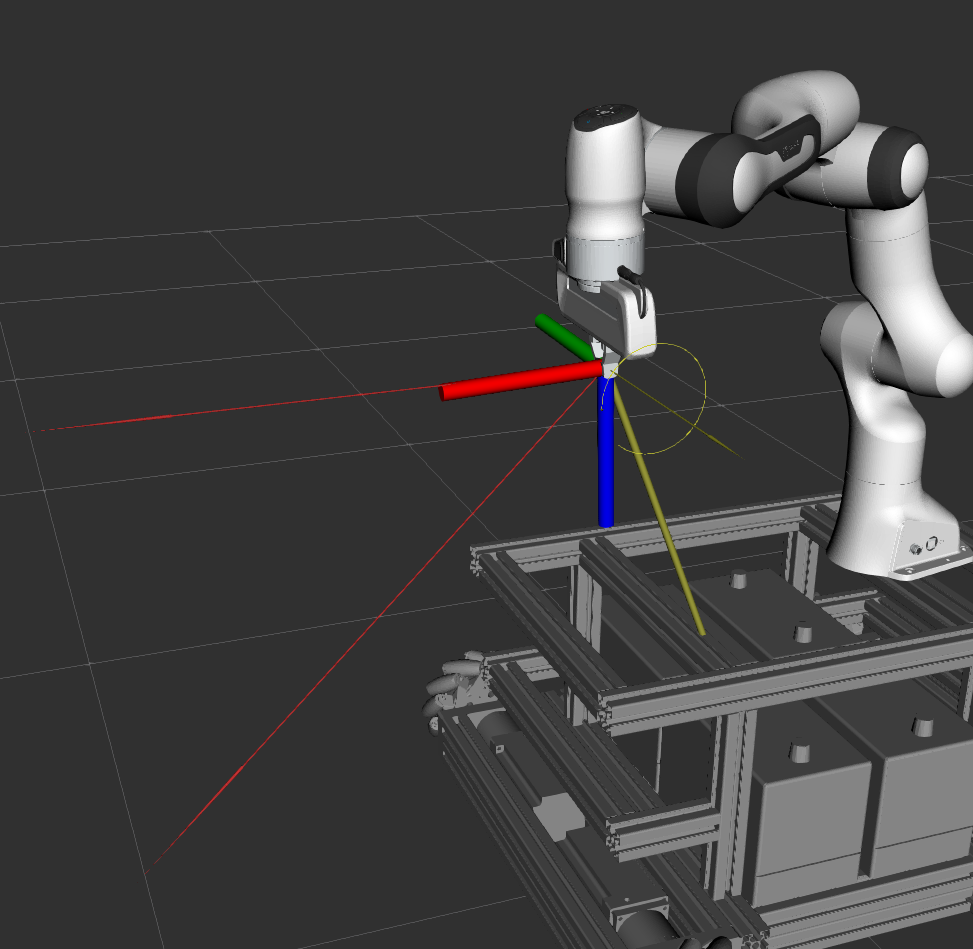
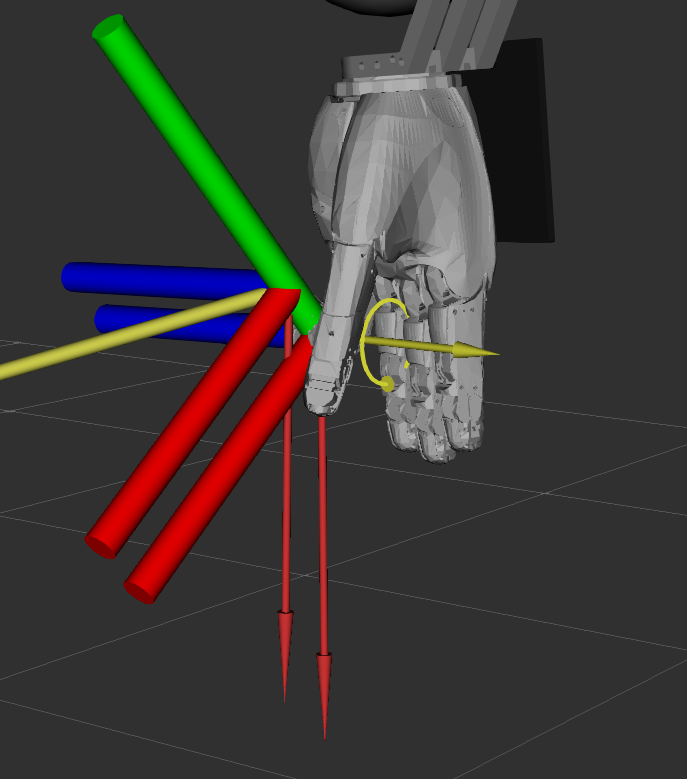
The applied and estimated forces coincide perfectly:
Humanoid:
Asimilar:

This is the case because there are no simulated torques applied to the point of contact. Exactly as supposed by the TC extender.
For the Humanoid, one can edit the template file and use the "FINGER" version of the parameters and goals and run the example again for using the fingers.
Use a much smaller force and torque because the finger impedances are much smaller.
Expect results similar to this:
Only the ESF reacher wrench:
With the TC extender wrench:
TC extender shows no torque! This is because only 3 sensors are used to estimate the applied force. Those are not enough to estimate 3 forces and 3 torques at the finger tip.
Also, the configuration of the Touch Contact Extender has the weights corresponding to those torques set (forced) to zero to avoid more than one solution.
¶ Tips
¶ To get goals for the Vector Field reacher, use the tf2_echo utility:
ros2 run tf2_ros tf2_echo "odom" "wessling_l-hand0_palm_link" --ros-args -r __ns:=/sim_humanoid_01 -r /tf:=/sim_humanoid_01/tf -r /tf_static:=/sim_humanoid_01/tf_static
Where "odom" is the reference frame, and "wessling_l-hand0_palm_link" is the end frame or final frame. This will return different representations of the homogeneous matrix of the end effector. You can use this as starting points.
You can also use the "rbc_keyboard_ctrl" program from the old RBC examples to "move around" the end effector and explore new positions.
If you want to reach and manipulate objects with markers you can use the aruco_opencv ROS2 node and then inside your python program use the TF utilities for getting a desired goal pose relative to a marker to send to the VF reacher. Check the program at: https://gitlab.com/arcoslab/arcos-lab-cognitive-architecture/kitchen-manipulation/arcos-lab-kitchen-manipulation-examples for more details.
¶ How to configure the Vector Field reacher parameters
Base and End links
The Vector Field reacher uses a kinematic chain to control, in cartesian space, an end-effector. This reachers automatically finds the joints and links that are part of continous kinematic chains. One must only give an initial (base) and final (end) reference frames. Since we use ROS2, we use TF homogenous Frames.
The easiest way to find the name and select the base and end links is to start the simulator, add the TF plugin and use the "Frames" section of it to visually show where each frame is and its corresponding name.
Other ways to find and select the existing frames of a particular robot:
- Use the /namespace/tf topic to get all then names of any published TF frame:
ros2 topic echo /sim_humanoid_01/tf
- Use and examine the xacro and urdf robot description files.
diag_jweights
Use very small numbers for joints that you want to give very low priority in the inverse kinematics solution. You can even use zero to "lock" a particular joint in its current position. Use high numbers or "1" to make full use of a particular joint.
¶ How to configure the Joint reacher parameters
joints
To find the names of the joints of a particular robots there are two methods:
- Use the xacro/urdf robot description files
- echo the topic: /sim_humanoid_01/joint_states
The second methods is the easiest and fastest. Use the following command to filter for only joint names:
ros2 topic echo /sim_humanoid_01/joint_states | grep -E -e "- [a-zA-Z]+[a-zA-Z0-9_-]*"
To find out where each joint in the robot is exactly:
- Examine the xacro/urdf files
- Test with the simulator movement with each joint!